Happy Halloween! We’ll kick off this holiday with some trick and treating!
I want to give out some sweet tips for you to add to your Photoshop goodie bag and I believe you will find them to be very helpful.
So here we go, here are 6 tricks and treats you can use in Photoshop to create some thrilling images!
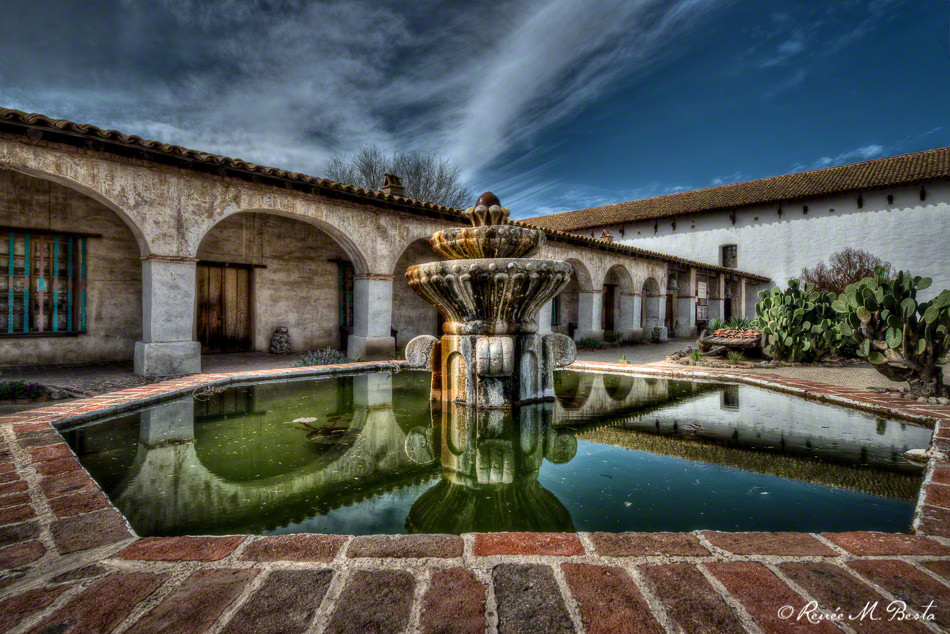
TRICK: DROP IN A QUICK SKY
When the sky is bleached white and you can really use something up there:
Select a sky shot that will fit with your base image

– and layer them up like this:

With the “Background copy” active (top layer), choose Layer / Layer Style / Blending Options.

In the “Blend If” section of the Blending Options Window, adjust the white “This Layer” slider (top right) revealing the sky later below.
Use the Option (Alt) Key to separate the adjustment slider in order to produce a smoother transition between the top and middle layers.
Get the best edge possible, knowing that the bottom layer will reveal itself globally within all white values (the church).

Add a Layer Mask to the middle (sky) image.
Use selections and fills or brush application of black and/or white paint to remove unwanted bits of sky or to further refine edges.

TRICK: HAND PAINTED EYELASHES
Use the Smudge Tool / Normal Mode / 70% strength / Sample all Layers checked / Finger Painting unchecked.
Use the Soft Round Pressure Size Brush on a New Layer that has been set to the Blending Mode of Multiply.

Test Brush Sizes until you have one that produces lines of good width that work well with the image you are working on.
Make quick flicks with the stylus from lid line out to create new eyelashes.
Modify after creation using Filter / Blur / Gaussian Blur, the Eraser Tool and / or Layer Opacity to make refinements.

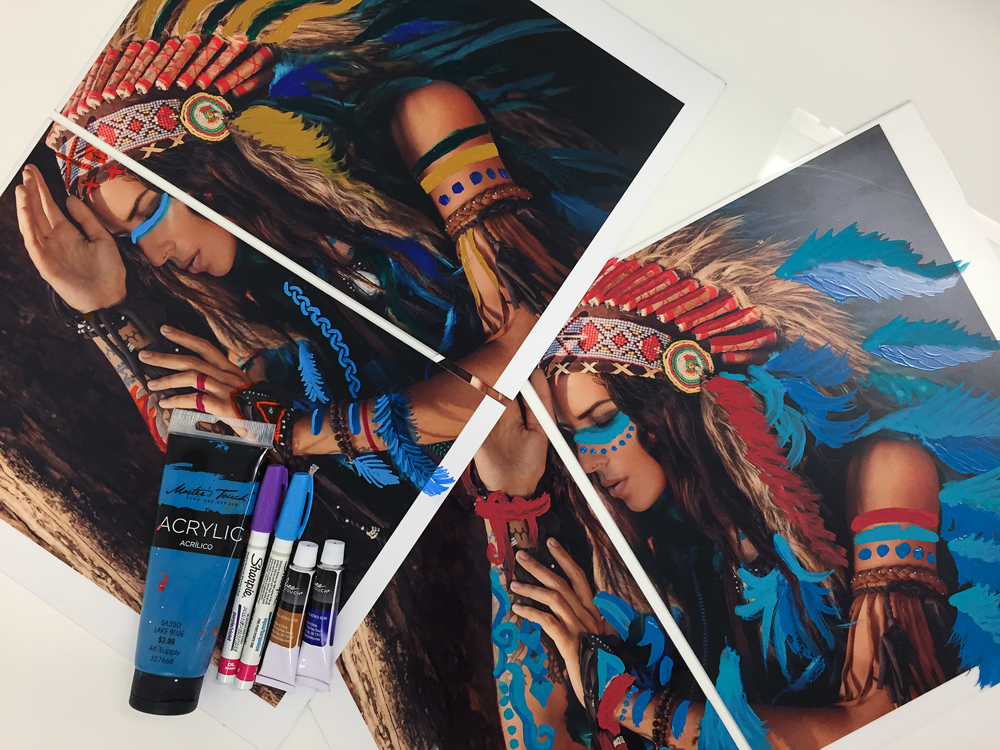
TRICK: ADD TRANSPARENT HAND COLOR TO BLACK AND WHITE
Use Adjustment Layers to create the Black and White or Brown Toned image from the original color file.
Then create New Layers above the Adjustment Layers to apply desired colors using the Brush Tool.
Use brush sizes that cover the areas smoothly (too small a brush creates blotchy paint; too large a brush requires a lot of clean up later).

Go ahead and use 100% opacity – you can adjust it after the color has been applied.
Use a separate layer for each color. I used three colors on the dress. Layers may be set to Color Blending Mode for transparency, or Normal for adding more intense color.
Layer opacity may be set for each layer as desired. They do not all have to be the same. To shape the color on individual layers, use Layer Masks.
When one object has been completely painted, create a New Group for the layers. If there is a lot of overpaint around the edges, just add a Layer Mask and use Black Paint to remove it.
The Layer Mask in the Group will hide whatever is undesirable on all layers, within the group at one time.

You can see that I’ve painted the dress, used a layer mask on the violet layer to shape the paint, included all three layers within a group, and added a Layer Mask to clean up around the edges.
Then I created another New Layer over the Group in order to begin to paint the water.
TREAT: YOUR WACOM STYLUS PEN HOLDER
The Wacom stylus pen holder opens up to reveal a collection of New Nibs (Yay!) and a little Nib Grabber so you can easily replace worn nibs.
AND you can keep your spares in a location where you know you can find the little beggars when you need them!

It’s easy to change the nib. Just use the grabber to gently pull out the worn one, and then tap the new one into the empty hole at the tip of the stylus.
You’ll know it’s time to change nibs when the one you are using is flat on the tip instead of it’s usual nice and round shape.
TREAT: DRAW A STRAIGHT LINE WITH THE BRUSH TOOL
Thank goodness we don’t need to draw straight lines very often because it’s nearly impossible to do it!
HOWEVER, when you need one, just press the tip of the stylus to the tablet, hold down the Shift Key, release the stylus and transfer it to where you want the end of the line to be and touch down again.
Photoshop will connect your dots with a straight line. Use View / Show / Grid to create perfect rectangles and squares.

TREAT: ZOOMING AROUND IMAGES
So you’re zoomed in to do some detail work and you want to jump to the other side…
You COULD just hold down the Space Bar and scroll your way over, BUT if you’ve got a ways to go, you can take a shortcut and save yourself some panning.
While you’re zoomed in, hold down the H Key and then drag your stylus towards your new destination.
Photoshop will temporarily zoom out so you can see the entire file and show you a box to identify the area that will be zoomed into on screen when you release the H Key.

When you release the H Key, Photoshop will zoom back into the new location, using the same zoom ratio you were using before.
Slick Trick – but it’s a Treat because it’s built into Photoshop and you don’t have to learn anything special in order to use it!
CLOSING THOUGHTS
There you have it – 3 Tricks and 3 Treats – half a dozen sweet goodies to make Photoshop even more fun!
If you like this and want more, check out my full series on mastering Photoshop:

Jane Conner-ziser is an award winning photographer, digital artist, premier educator and independent consultant. With over 25 years of experience, 19 of them in digital imaging and evolving technologies, the techniques Jane developed for facial retouching and enhancement and portrait painting from photographs are widely emulated by photographers and digital artists worldwide through her classes, online training and educational products. You can learn more on her website.