If you’re not using Layers in Photoshop, you are barely scratching the surface of this powerful imaging software.
Layers offer you unlimited opportunities to experiment without fear of losing original data.
They also give you the chance to go back and edit your decisions any time in the future – you can repurpose image files by taking advantage of some previous work while creating some new changes.
Layers are pretty intense to try to learn all about them at one time. We’ll take it slow and start from the beginning by making a File / New document (Command or Control N).
HOW TO SET UP A NEW DOCUMENT IN PHOTOSHOP

When you choose to make a New Document, a dialog box opens in which you can tell Photoshop what kind of File you want to make, what size and resolution you want to have, what colour space you want to utilize, and other attributes that you want to work with.
Document Name, Size, & Resolution
Here, I’ve entered a name for the New Document, chosen width and height in inches, and entered a resolution I want to work with.

As I entered the size and resolution dimensions, the dialog box displayed the Image Size the new file will be.
User manuals for printers provide the native resolution for the model you are using.
If you are using a colour lab, ask them what resolution they want from you. Internet is 72 by whatever pixel size you want the image to be on screen.
In addition to the name and size of the document, other attributes may be chosen as well.
Below the size and resolution fields are fields that allow you to choose specific technical attributes for your New Document.
Color Mode

First up are fields for choosing the Colour Mode and Colour Depth you would like to have.
RGB is the most popular choice for photographers because most of them output to RGB printers. The prepress industry standard is CMYK.
Bit Depth
Bit depth is the number of colour nuances you want to include in your work.
The deeper the depth, the more colours you can potentially use and see, however not all of them may be available in your output depending on where you’re going with the image.

If you are using your own output, experiment and determine what is best for you (some artists work with 32 bit colour depth and convert it down for different outputs).
If you are using a lab, ask them what they want to work with. I’ve chosen RGB colour and an 8 bit colour depth.
Background Contents
Next, you get to choose the contents of the Background. I like to think of the Background as the piece of paper that I want to draw on.
I’m choosing White – a piece of white paper – but you can choose other things as well.

If you have colours already picked in your u Window, and you choose Background Colour here, the New “piece of paper” will be the colour in the Background in the Colour Window.

If you choose Transparent, think about working on a piece of clear plastic. There won’t be a background color, just the artwork you create.
This option is nice for creating logos or other artwork that you want to overlay onto other images.
When Other is selected, the Colour Picker Window will open allowing you to choose any color you want.
Now we’ll drop down to the next option, the Colour Profile – another opportunity to study in depth!
The Colour Profile

As you can see, there are loads to choose from but once again, a lot of it may be determined by how you are using your file.
If you are using a photo color lab for printing, sRGB is likely the profile you need to send to them, even if you work and save your originals in larger color spaces, like Pro Photo RGB.
You can even choose not to color manage your file, but you will have to choose a color space eventually in order to make prints that look the same as what you see on your monitor.
Pixel Aspect Ratio
Last in the New document dialog box is a choice for Pixel Aspect Ratio.
This requires us to understand that many different business and kinds of artists use Photoshop.
Square pixels mean that the length and width of each pixel are the same, 1:1. Not every media uses square pixels – for example, some videos use rectangular pixels, thus the other choices here.
If you are a photographer or graphic artist, Square Pixels is your logical choice. If you are working in a different medium, ask what you need.

Okay, now let’s get onto Layers!
OVERVIEW OF THE LAYERS WINDOW
Here is our New document and the Layers Window.

The Layers Window offers a lot of Layer options but for this article, we’ll focus on the center area, maybe adding an option or two, but saving the advanced options for the next article.
What I would like for you to notice here is that in the Layers Window, the Background we chose is already there.
It is white, representing exactly what I chose in the New Document dialog box. If a photograph had been opened, this square area would show a small tile of the photo instead.

Let’s look at the Layers Window for our new white document:

For now, we are working in the center section of the Layers Window.
Layer Visibility
The first component of our Background is Layer Visibility.

It is represented with a little graphic of an eye that can be toggled on and off by clicking on it.
Click once to choose not to see what is on that layer and again to bring it back.
The little eye will disappear and reappear to provide a visual reference of what you are and are not seeing during your working session.
If you are practicing along with me, it will not be active now because the Background layer is locked, so please bear with me.
Layers Visual Representation
The next icon on the layer is a visual representation of what is on the layer, in this case, a solid covering of white.

If this had been a transparent background, it would look like this:

Photoshop presents transparency as a grid of white and gray squares. This will be important to remember when we begin creating new layers on this image.
Layer Name & Lock Icon
Moving right is a section that provides a written name for the layer. The word Background is provided as default and it is locked by default. See the little lock on the far right?

This can be changed either by renaming the Layer or by clicking on the lock icon.
If you click on the lock icon, the name of the layer will change from Background to Layer 0 and the little lock will disappear.
If you double-click on the word Background, a dialog box will open in which you can type in a new name of your choice and assign other attributes as well.

Either way, now that the Background is unlocked, you can choose whether you want to see it or not by toggling the Layer Visibility icon.

Most photo artists, including myself, leave the Background as is, locked and visible, and build upon it.
I like to keep the Background intact so I retain the original image as a reference, which allows me to better evaluate my progress, plus I can use it as an “eraser” if I make a mistake.
When you are working with multiple Layers and moving between them, it is very important to click in the right place.
Whenever you click on the letters, Photoshop thinks you want to rename the layer. If you click on a lock, Photoshop thinks you want to unlock the layer.
So, when you are choosing different layers, click on an area within the layer that does not contain options!

Here is a file that has a white Background plus three additional layers.
Layer 2 is the active layer, easily identified because it is highlighted, meaning that if I draw with blue paint, the paint will be applied to Layer 2.
If I want to select a different layer or the Background to work on, I should click on a blank area of the layer so Photoshop knows I just want to work on a different layer.
Let’s make some layers now.
HOW TO USE LAYERS IN PHOTOSHOP
We’ll start by making a New Layer on top of the Background. From the Main Menu Bar, choose Layer New, or use the Keyboard Shortcut Shift / Command (Control) N.

This will open a dialog box in which you can type in a name of your choice for the New Layer and also assign other attributes if you wish.
Another way of making a New Layer is to click on the New Layer icon at the bottom of the Layers Window.

The icon looks like a square piece of paper with one corner turned up.
If you would like to use the quick icon in the Layers Window, but you would like to name your new Layer on the way in, hold down the Option (Alt) Key while you click on the icon.
The dialog box will open and you can name the Layer. I’m naming mine Red Circle because that’s what I’m going to put on the New Layer.

Now our Layers Window looks like this:

So far the New Layer is completely transparent, like a sheet of clear plastic. Let’s put a red circle on it now.
You can use the Brush Tool and paint one freehand, or you can use the Elliptical Marquee to create a circle and fill it with red – it’s your choice.
The only thing on this layer is the red circle, surrounded by transparency.

The Layers Window looks different now. The Background is a solid white square, but the Red Circle Layer shows a red circle surrounded by the transparency grid.
We can tell just by looking at the Layer Window what we have and where it is. Just for fun, turn the Layer Visibility off on the Red Circle Layer.
The circle disappears. Click on it again and the circle comes back.

Now I’m going to make another New Layer. This time I’m naming it Blue Square and I’ll put a square of blue on it.

The New Layer appears over the last highlighted (active) Layer. The Blue Square Layer is on top of the Red Circle Layer, which makes the blue square overlap the red circle.
The Blue Square Layer is now the highlighted, or active layer. This layer also contains only the blue square, surrounded by transparency.
We can think we now have a solid piece of white paper with two sheets of clear plastic on top of it, one contains a red circle and the other a blue square.
What if we wish to move the red circle over? The first thing we have to do is make the Red Circle Layer the active one so Photoshop knows which layer we want to move.
Clicking on the Red Circle Layer (in a blank area) selects it. The Move Tool may be used to move the red circle to a different location.

Let’s make another New Layer. This time, it’s important to note that the current active Layer is the Red Circle Layer.
This means that the next New Layer will come in just above the Red Circle Layer and below the Blue Square Layer.
I’m going to create a Purple Rectangle Layer and make a purple rectangle on it.

Sections of the rectangle are above the red circle and under the blue square.
In the Layers Window, you can see why. The Red Circle Layer is under the Purple Rectangle Layer and the Blue Square Layer is on top of everything.
What if you want to put the purple rectangle on top? You can move the Layer up in the Layers Window just by pressing on it (blank area please) and dragging it up.

Remember, layers can be rearranged as many times as you want.
Let’s make one more Layer, a Yellow Oval Layer, but this time let’s say we want to place it under the current active layer.
If you hold down the Command (Control) Key when you click on the New Layer icon at the bottom of the Layers Window, the New Layer will appear under the current active layer.
If you hold down both the Option (Alt) and the Command (Control) Keys while you click on the New Layer icon, you can also name the layer on the way in.

You can see that the yellow oval is over the red circle, over the blue square, but under the purple rectangle – just like it is in the Layers Window.
Making New Layers is easy and you can see that it is also easy to move them up and down in the Layers Window in order to rearrange them.
Items on Layers can be moved around using the Move Tool as many times as you wish. Layers can also be copied or duplicated.
Let’s say that we would like to see two purple rectangles, exactly the same size and color.
It’s easy to do: click on the Purple Rectangle Layer to select it and then choose Duplicate from either the Main Menu Bar / Layers, or from the More Options drop-down menu located at the upper right corner of the Layers Window.

You can choose to rename it on the way in, or you can use the default name, in this case, Purple Rectangle copy.
Either way, the file looks the same because the duplicate layer came in exactly on top of the original one, but the Layers Window shows that there are now two layers with purple rectangles.

Let’s use the Move Tool to reposition the copy rectangle, and Edit / Transform / Rotate 90 degrees clockwise to turn the rectangle vertical.
Then, let’s grab the layer and move it down in the stack, under the yellow oval.

Now, let’s make a New Layer and fill it with a solid color. To do this, make the New Layer and then choose Edit / Fill – and pick the color of your choice.
Because the current active layer is the Purple Rectangle copy, the solid color layer will come in on top of it.
However, if you wish to change where the New Layer comes in, just pre-select the layer just under where you want it to be. I’m going with what we have and will create a solid pink layer.

This is interesting – some of the shapes have disappeared. In addition, when we look at the Layers Window, the Background is also gone.
Two things have happened. First, the Solid Pink Layer is located under the yellow oval and one of the purple rectangles.
The other purple rectangle, the blue square and the red circle are under the solid pink layer, and if you notice in the upper right area in the Layers Window there is an option for Opacity, currently set to 100%.
This means that the solid pink layer is 100% opaque – you can’t see through it; you can’t see what is under it.
The Background is no longer visible, and because we’ve created so many layers, they all cannot be displayed within the Layers Window.
Fortunately, there is an adjustment at the bottom of the Layers Window by which we can stretch the window longer; just pull it down like a window shade.

The last thing I’m going to touch on is opacity.
We mentioned it before because the 100% opacity of the solid pink Layer prevented us from seeing the layers underneath it.
If the Opacity slider is moved down to 75%, the solid pink Layer becomes 75% opaque – and you can see 25% of the underlying layers through it.

Use Layer opacity – every layer can have a different Layer Opacity – so see what you can come up with. This is what I did with mine:

With only the simple tasks of making layers, re-arranging the layer order, and using layer opacity, it’s easy to see how powerful using Layers can be.
And there’s more! If you are new to Layers, please take some time to experiment with making, naming, and moving layers around.
CLOSING THOUGHTS

One of the nice things about working with Layers is that you can choose to save the file with all of the Layers; use PSD or TIFF format.
This means that you can do some work one day, and then put the piece away to finish later without losing the ability to move things around, adjust colors and make other changes to your work.
When the work is done, many artists choose to save the master file with all of the layers and then flatten the image (Layers / Flatten) and save it again in the size and format they need for particular outputs.
And that’s it for using Layers in Photoshop! I hope you have fun with it!

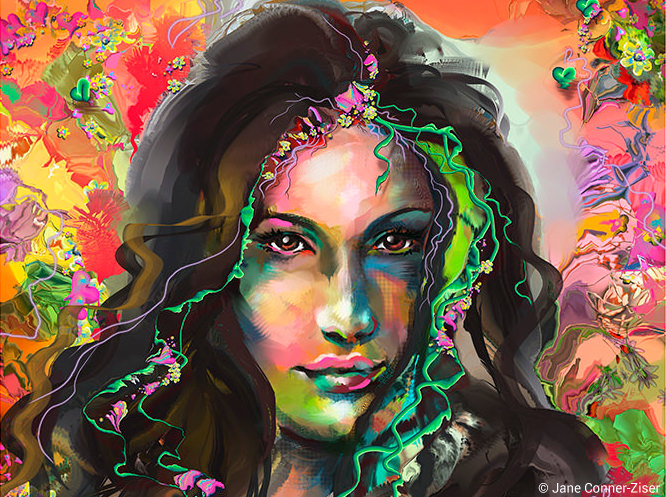
Jane Conner-ziser is an award winning photographer, digital artist, premier educator and independent consultant. With over 25 years of experience, 19 of them in digital imaging and evolving technologies, the techniques Jane developed for facial retouching and enhancement and portrait painting from photographs are widely emulated by photographers and digital artists worldwide through her classes, online training and educational products. You can learn more on her website.